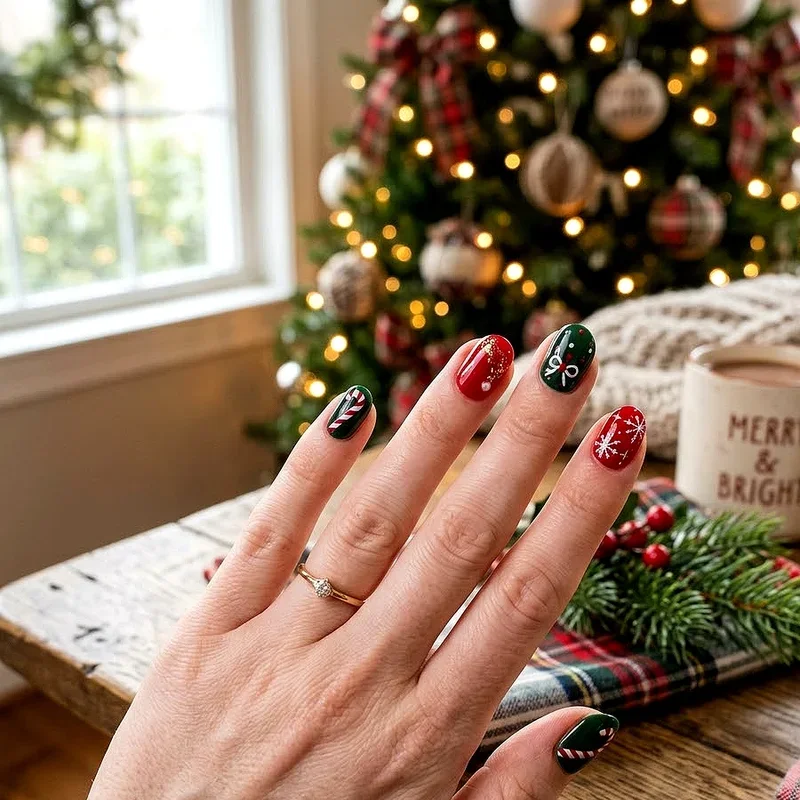
15 Simple Nail Design Ideas for Everyday Style
Discover 15 simple nail design ideas perfect for everyday style. From minimalist dots to trendy French tips, elevate your manicure game effortlessly!

Ever looked at your plain nails and thought, "I need a change, but I don't have hours to spend at the salon"? You're not alone! We've all been there, scrolling through Instagram, admiring those perfectly manicured nails while wondering if we could ever achieve something similar at home. Well, guess what? You absolutely can! Whether you're a busy professional, a student on a budget, or simply someone who loves expressing themselves through nail art, these 15 simple nail design ideas will revolutionize your everyday style. No need for professional tools or artistic genius – just your creativity and a few basic supplies. Ready to transform those bare nails into miniature masterpieces? Let's dive into a world where simplicity meets style, and every day becomes an opportunity to showcase your personality right at your fingertips!
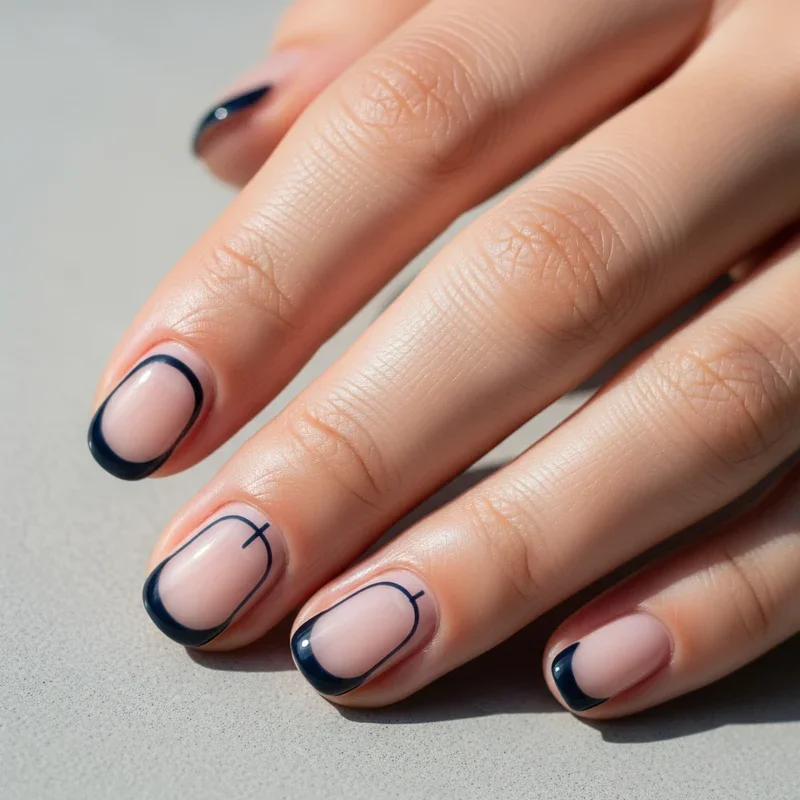
1. The Classic French Tip with a Twist
Who says French tips have to be boring? This timeless design gets a modern makeover that'll make your nails look professionally done without the salon price tag. Instead of traditional white tips, why not experiment with pastel colors, metallics, or even rainbow variations? You can create thin, medium, or thick tips depending on your mood and style preference. The beauty of this design lies in its versatility – it works perfectly for both casual coffee dates and important business meetings. Simply use tape or nail guides to achieve those crisp, clean lines that'll have everyone asking where you got your nails done. The key is maintaining steady hands and working in thin layers to prevent pooling at the tips. Pro tip: seal everything with a good top coat for that glossy, long-lasting finish that screams sophistication.

2. Minimalist Dots and Spots
Sometimes less really is more, and polka dots prove this theory perfectly! This playful yet sophisticated design requires nothing more than a toothpick or bobby pin and your favorite nail polish colors. Create random dots for a fun, carefree vibe, or arrange them in neat rows for a more structured look. You can stick to monochrome for elegance or mix and match colors for a cheerful appearance. The best part? Even if your dots aren't perfectly round, they'll still look intentionally artistic and charming. This design works beautifully on both short and long nails, making it universally flattering. Whether you're heading to brunch with friends or typing away at your desk, these dotty delights will add just the right amount of personality to your everyday look. For added dimension, try varying the sizes of your dots or creating a gradient effect with different shades.

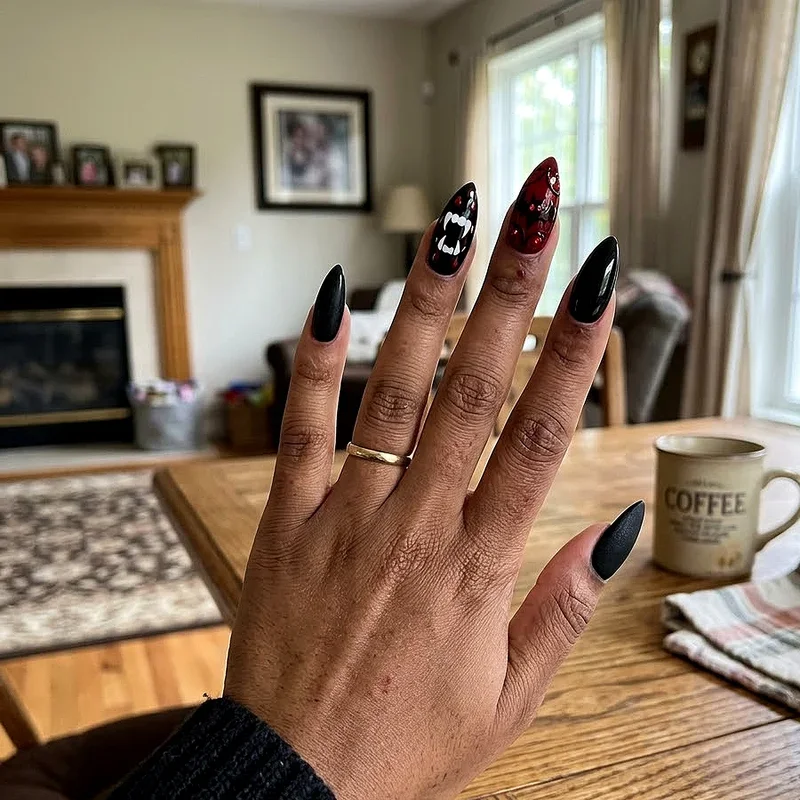
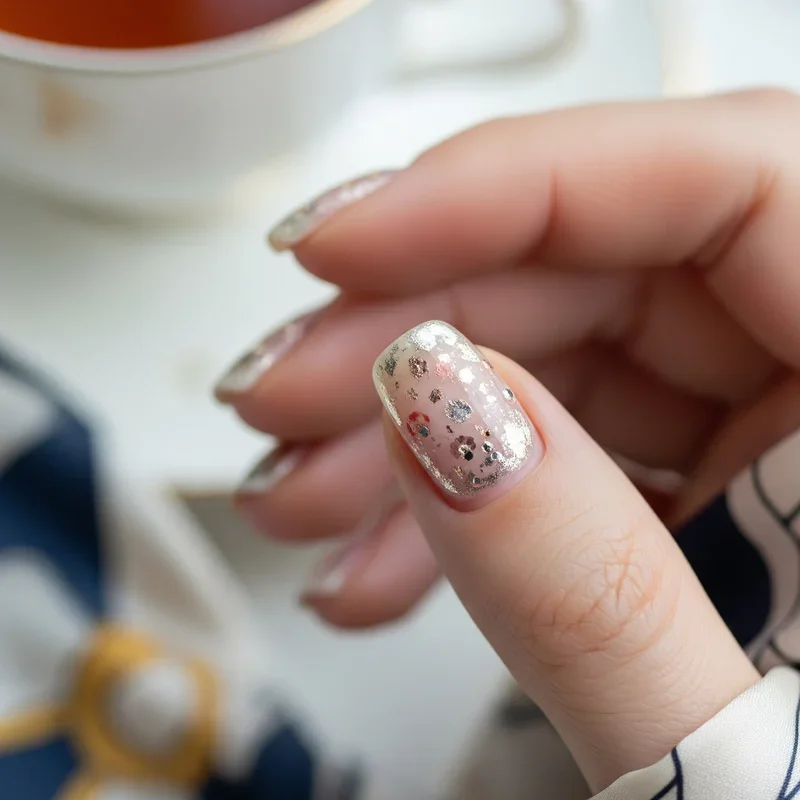
3. Single Accent Nail Design
Why stress about decorating all ten nails when one statement nail can steal the show? The accent nail trend is perfect for nail art beginners or anyone short on time. Choose your ring finger or thumb as your canvas and go wild with glitter, rhinestones, or intricate patterns while keeping the other nails in a complementary solid color. This approach creates visual interest without overwhelming your overall look. Think of it as the jewelry of nail art – sometimes one bold piece is all you need to complete an outfit. You can match your accent nail to your mood, outfit, or even the season. Popular accent nail ideas include metallic foils, tiny gems arranged in patterns, or even a completely different color that complements your base shade. It's like having a tiny piece of art that changes with your style, making every handshake or coffee cup lift a moment to showcase your creativity.
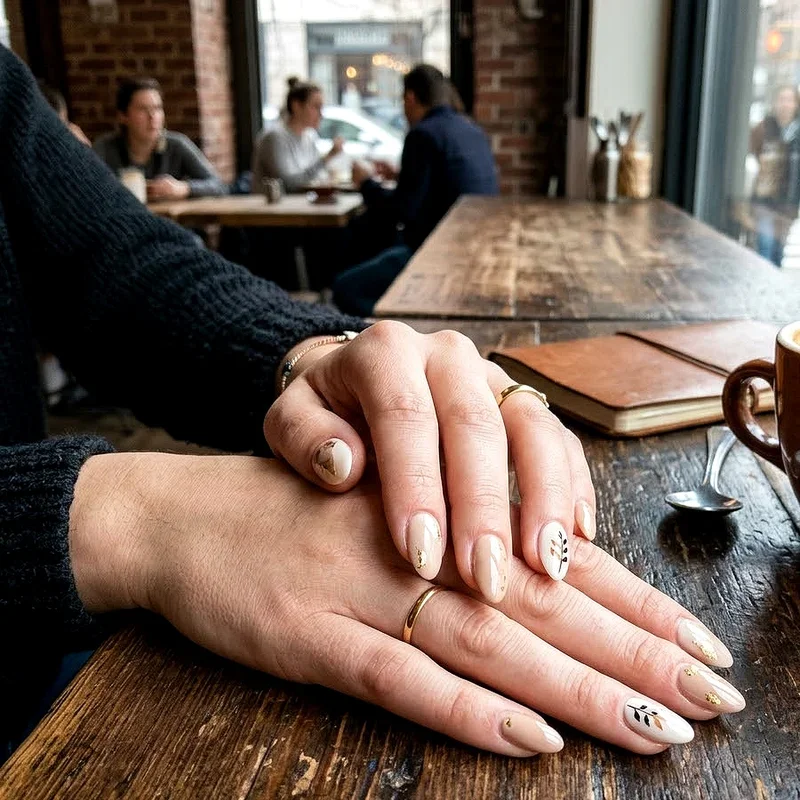
4. Negative Space Nail Art
Embrace the beauty of bare nails with negative space designs that are taking the nail art world by storm! This trendy technique involves leaving portions of your natural nail visible while creating patterns with polish around them. Think geometric shapes, diagonal lines, or abstract designs that play with the contrast between polished and unpolished areas. The result? A sophisticated, modern look that's surprisingly easy to achieve with some tape and patience. Your natural nail becomes part of the art, creating an illusion of complexity that's actually quite simple to execute. This style is perfect for those who want something unique but not too bold for everyday wear. Start with clean, well-moisturized nails for the best results, as the bare portions will be on display. Plus, as your nails grow, the design often looks intentional rather than grown out, giving you extra time between manicures.
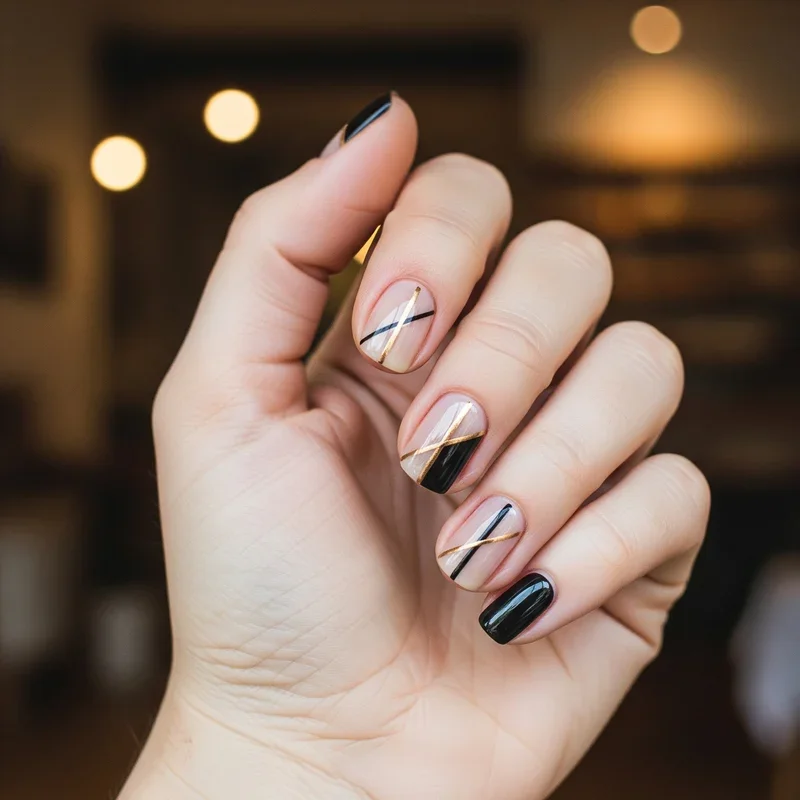
5. Simple Geometric Patterns
Transform your nails into a modern art gallery with easy geometric designs that anyone can master! Using striping tape or even regular scotch tape, you can create triangles, squares, and abstract shapes that look incredibly professional. The key is choosing complementary colors and keeping your lines clean and crisp. Start with a base color, add your tape in whatever pattern speaks to you, paint over it with a contrasting shade, and peel away to reveal your masterpiece. It's like creating a puzzle on each nail, where you control the pieces and the final picture. These designs work especially well with neutral or monochrome color schemes for office-appropriate nail art. Try combining matte and glossy finishes within the same design for added sophistication. Who knew that basic shapes from geometry class could make such stylish statements on your fingertips? The possibilities are endless with this versatile technique.
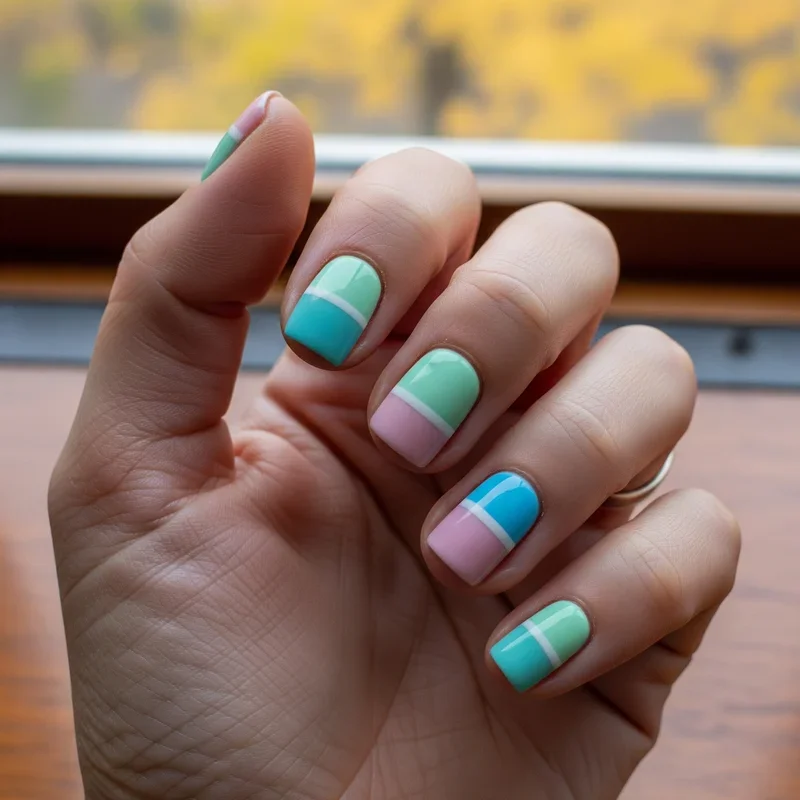
6. Pastel Color Blocking
Soft, dreamy pastels aren't just for Easter anymore! Color blocking with gentle hues creates a fresh, modern look that brightens any outfit without being too loud. Divide each nail into sections using tape or freehand your way to happiness with complementary pastel shades. Think mint green paired with baby pink, or lavender mixed with pale yellow. The beauty of this design is its forgiving nature – slight imperfections actually add to its artistic charm. You can go horizontal, vertical, or even diagonal with your blocks, creating different moods with the same technique. For an extra touch of sophistication, outline each block with a thin line of white or metallic polish. This style perfectly captures that effortless chic vibe we all crave, making your hands look like they belong in a trendy lifestyle magazine. It's proof that sometimes the simplest ideas create the most stunning results when executed with confidence.
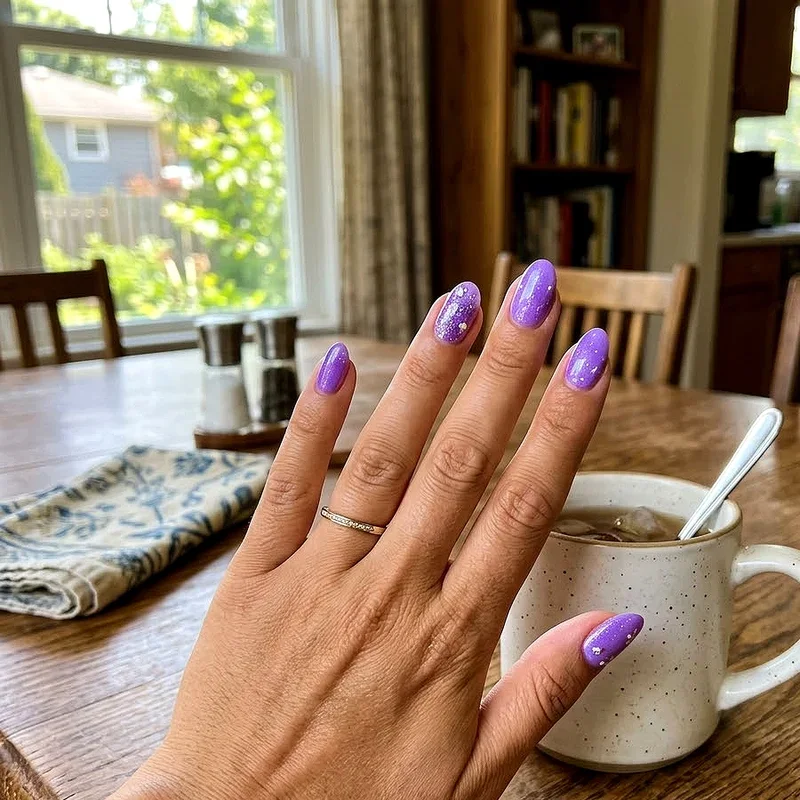
7. Glitter Gradient Magic
Who doesn't love a little sparkle in their life? Creating a glitter gradient is easier than you might think and adds just the right amount of glamour to your everyday look. Start with your favorite base color, then use a makeup sponge to dab glitter polish from the tips downward, creating that perfect fade effect. The concentration of glitter at the tips gradually disperses toward the cuticle, giving your nails a magical, ethereal quality. You can use chunky glitter for drama or fine glitter for subtle shimmer. Layer different sizes of glitter for a multidimensional effect that catches light from every angle. This design works beautifully for transitioning from day to night – professional enough for the office but festive enough for after-work drinks. For longevity, seal with two coats of top coat to prevent glitter from catching on fabrics. It's like carrying a little celebration on your fingertips wherever you go!

8. Tiny Heart Details
Nothing says sweet and simple quite like tiny hearts adorning your nails! Using a toothpick or thin brush, you can create these lovable symbols in minutes. Place a single heart on each nail for minimalist charm, or scatter several across one accent nail for concentrated cuteness. The trick to perfect hearts? Create two dots side by side, then drag down from each dot to form the point. Mix colors for variety or stick to classic red on pink for timeless appeal. Consider placing hearts at different angles or creating a falling hearts effect for added movement. This design is perfect for date nights, Valentine's Day, or just when you're feeling extra romantic about life. Even if your hearts turn out a bit wonky, they'll look endearingly handmade. After all, isn't love supposed to be perfectly imperfect? Add a glossy top coat to make those hearts really pop against any base color.
9. Subtle Marble Effect
Channel your inner artist with a marble effect that looks complex but is surprisingly simple to achieve! Using the water marble technique or simply swirling colors with a toothpick, you can create unique patterns that mimic expensive stone. Start with a light base color, add drops of two or three complementary shades, and gently swirl them together before the polish dries. Each nail becomes a one-of-a-kind masterpiece, just like real marble in nature. The organic, flowing patterns are forgiving of mistakes and actually look better with some randomness. This sophisticated design works beautifully in classic black and white or soft pink and gold combinations. For best results, work quickly and don't overwork the design – less swirling often creates more realistic marble patterns. It's the perfect way to add an upscale touch to your look without the upscale price tag. Your nails will look like tiny pieces of luxurious stone art that belong in a high-end gallery!

10. Easy Striped Nails
Stripes are the ultimate pattern for creating visual interest with minimal effort! Whether you prefer thin pinstripes or bold racing stripes, this design adapts to any style preference. Use striping tape for perfectly straight lines or embrace the handmade look with freehand stripes using a thin brush. Vertical stripes can make short nails appear longer, while horizontal stripes add width to narrow nail beds. Mix it up with different colors on each nail or stick to a two-tone palette for cohesive elegance. Try alternating matte and glossy stripes for textural interest, or create a candy cane effect with diagonal stripes. The beauty of stripes is their versatility – nautical navy and white for summer, black and gold for evening glamour, or rainbow stripes for pure fun. This timeless pattern never goes out of style and always looks fresh and modern.
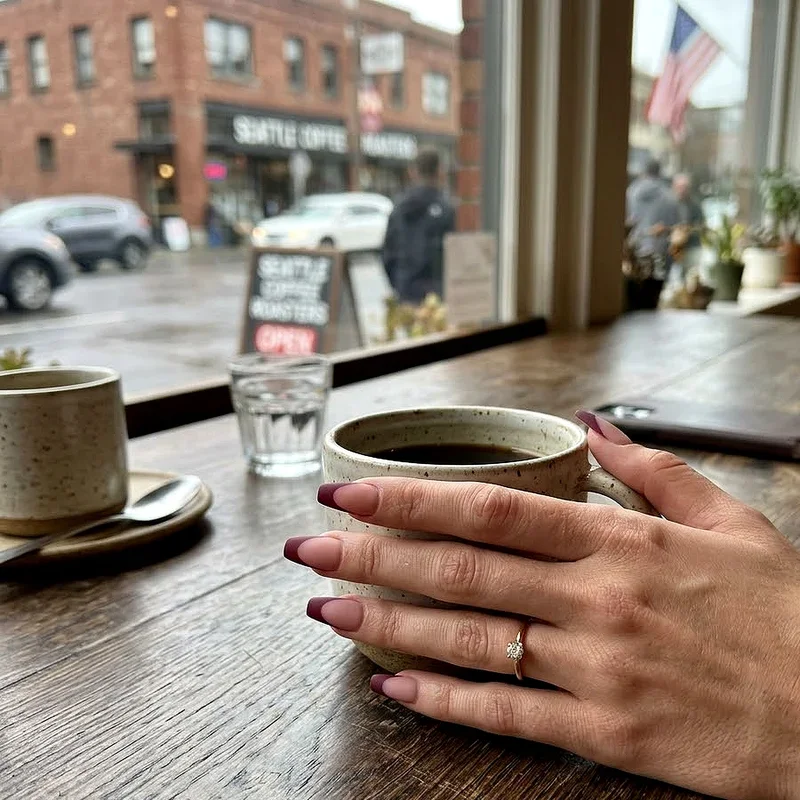
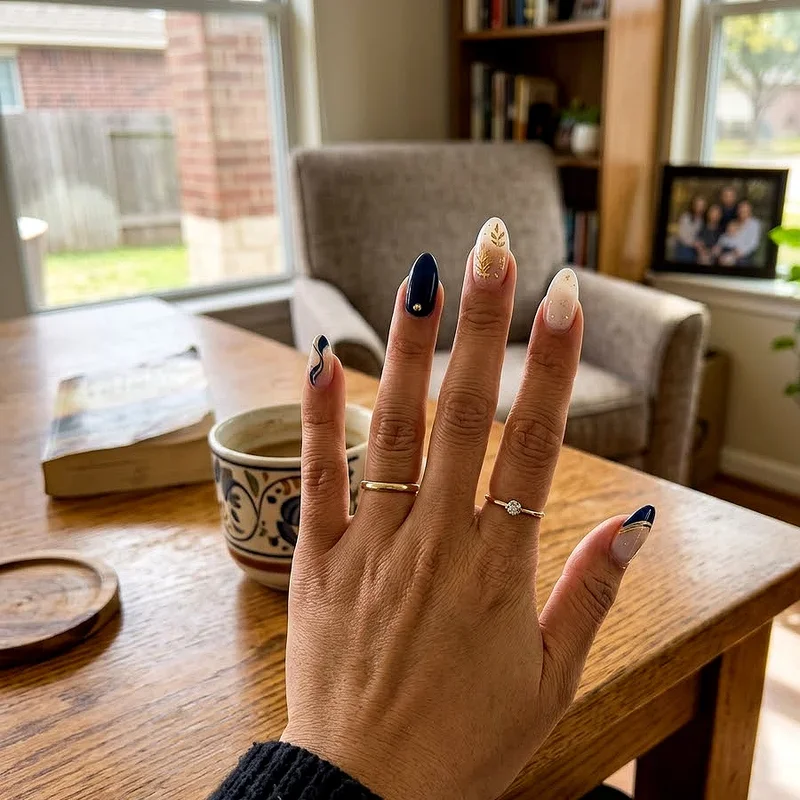
11. Nude and Gold Combination
Elevate your natural look with the perfect marriage of nude polish and gold accents! This sophisticated combination works for literally any occasion, from board meetings to beach weddings. Apply your favorite nude shade as a base – choosing one that complements your skin tone – then add gold details using striping tape, stickers, or freehand designs. A single gold stripe down the center, golden tips, or small gold dots can transform a simple nude manicure into something special. Try creating golden chevrons at the base or tips for a modern twist on this classic combo. The contrast between the understated base and metallic accent creates an expensive-looking manicure that whispers rather than shouts. This design is perfect for those who want their nails to enhance rather than dominate their overall look. It's like wearing delicate gold jewelry on your fingertips – subtle, elegant, and always appropriate for any dress code or occasion.
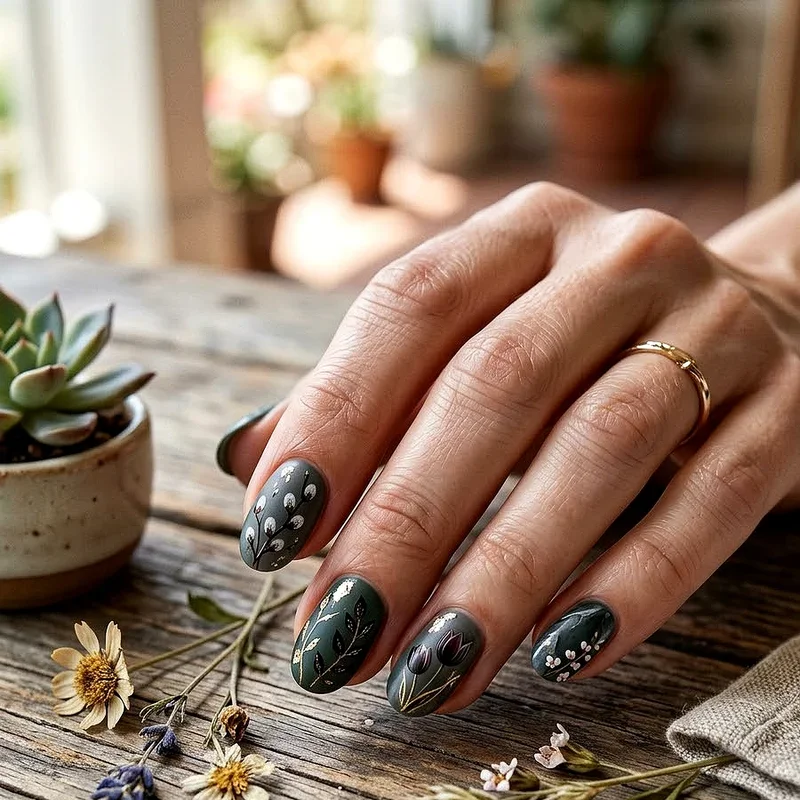
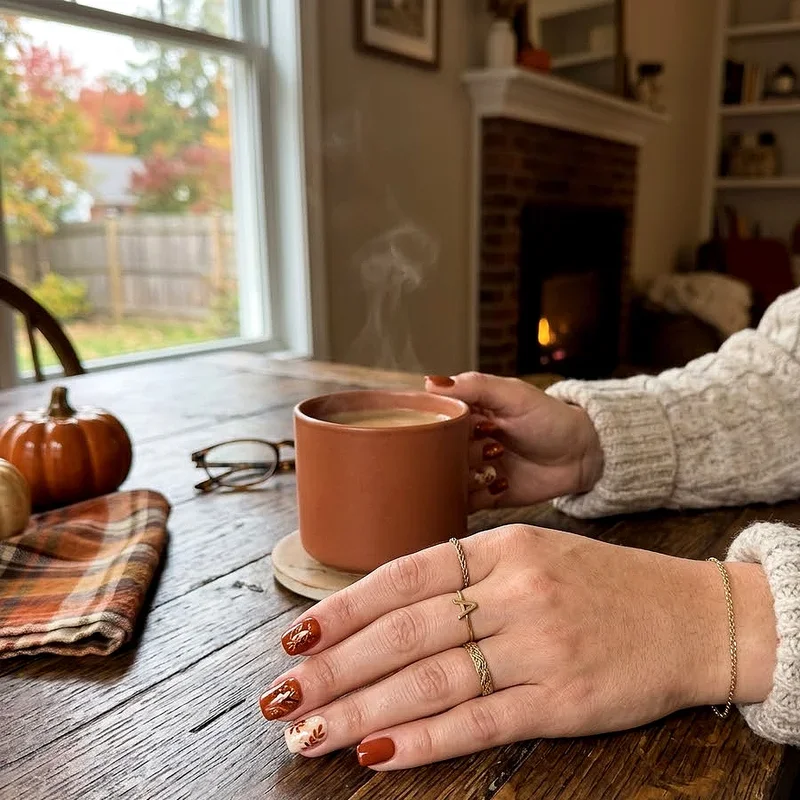
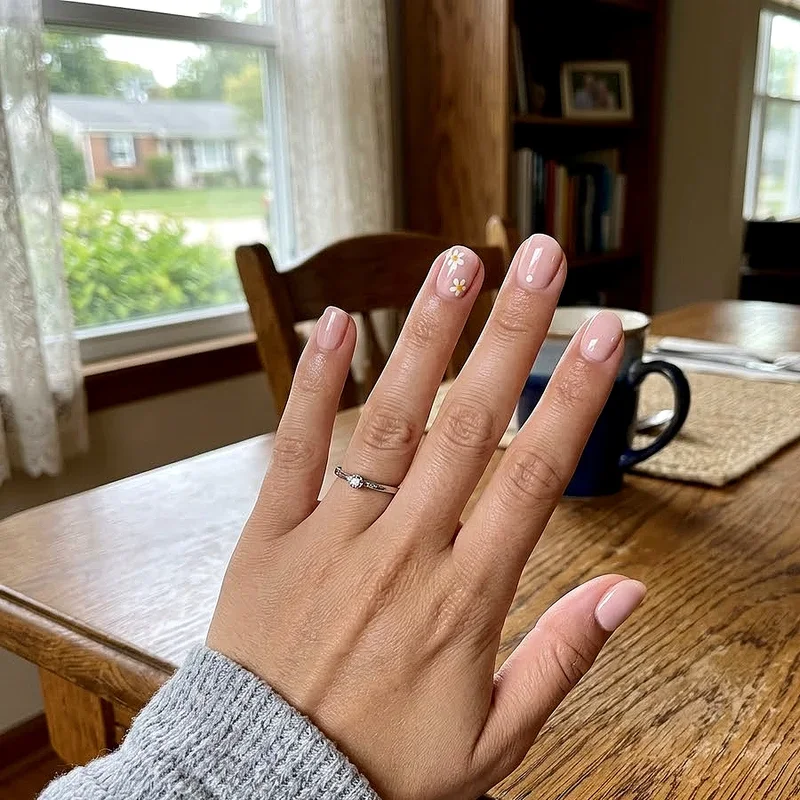
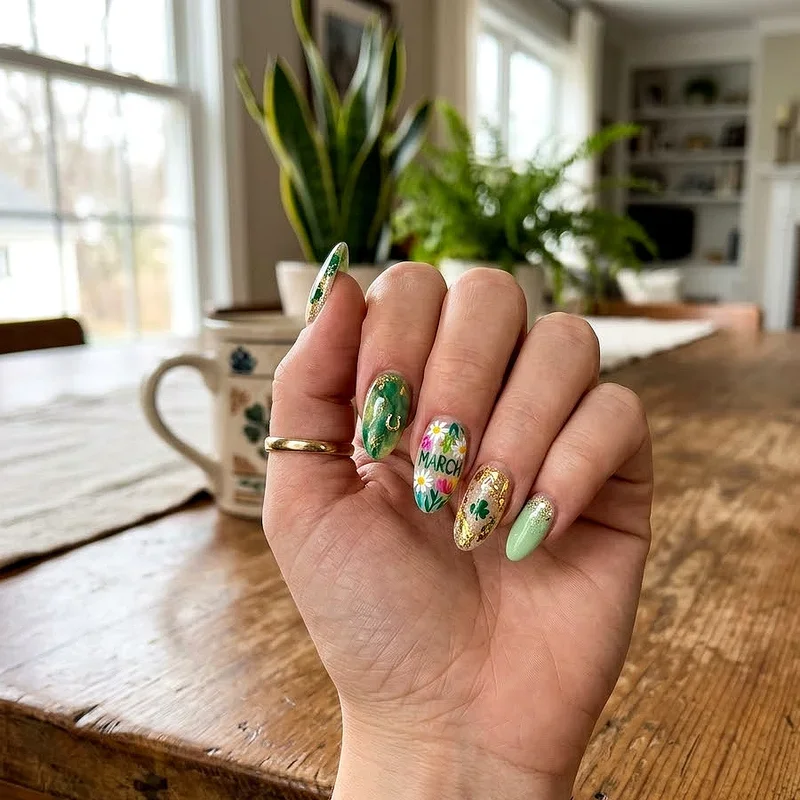
12. Simple Floral Accents
Bring a garden to your fingertips with easy floral designs that even beginners can master! Using a dotting tool or toothpick, create five-petal flowers by placing five dots in a circle and adding a center dot in a contrasting color. You can scatter tiny blooms across all nails or concentrate them on accent nails for impact. Keep it simple with daisies or get creative with abstract floral shapes. Add tiny green dots for leaves to complete your miniature garden. The key is not overthinking it – flowers in nature aren't perfect, so yours don't need to be either! Choose soft pastels for spring vibes or bold colors for a tropical feel. Layer different sized flowers for depth, or create a vine effect by connecting blooms with delicate stems. This feminine design adds a touch of whimsy to any outfit and never fails to earn compliments. It's amazing how a few strategic dots can transform into beautiful botanical art!

13. Half-Moon Manicure
Give your nails a vintage-inspired makeover with the classic half-moon design that's making a huge comeback! This reverse French manicure highlights the natural moon at your nail base, creating an elegant and unexpected look. Use hole reinforcement stickers or carefully freehand the curved line at your cuticle area. Paint the moon in a contrasting color or leave it bare for negative space appeal. The design works beautifully with any color combination – try deep burgundy with gold moons for drama or soft pink with white for romance. For a modern update, create double moons or add a thin outline around the moon shape. This style particularly flatters longer nails but can be adapted for shorter lengths too. It's like wearing a tiny crescent moon on each finger, adding celestial charm to your everyday style. The retro vibe feels fresh and modern when executed with contemporary color choices and clean lines. (Word count: 140)
14. Metallic Tips Design
Take your tips to the next level with metallic polish that catches light and attention! This modern twist on traditional tips uses silver, gold, copper, or rose gold to create a futuristic edge. Apply your chosen metallic shade to just the tips of your nails, either straight across or at an angle for added interest. The reflective quality of metallic polish makes your nails look longer and more elegant. You can keep the rest of the nail bare for a minimalist look or use a complementary base color for more coverage. Try mixing different metallics on each nail for an eclectic vibe, or stick to one shade for cohesion. This design is perfect for those who want something special without going overboard. It's like dipping your fingertips in liquid metal – edgy yet wearable for any occasion. The best part? Metallic tips hide chips better than regular polish, making this design both beautiful and practical!

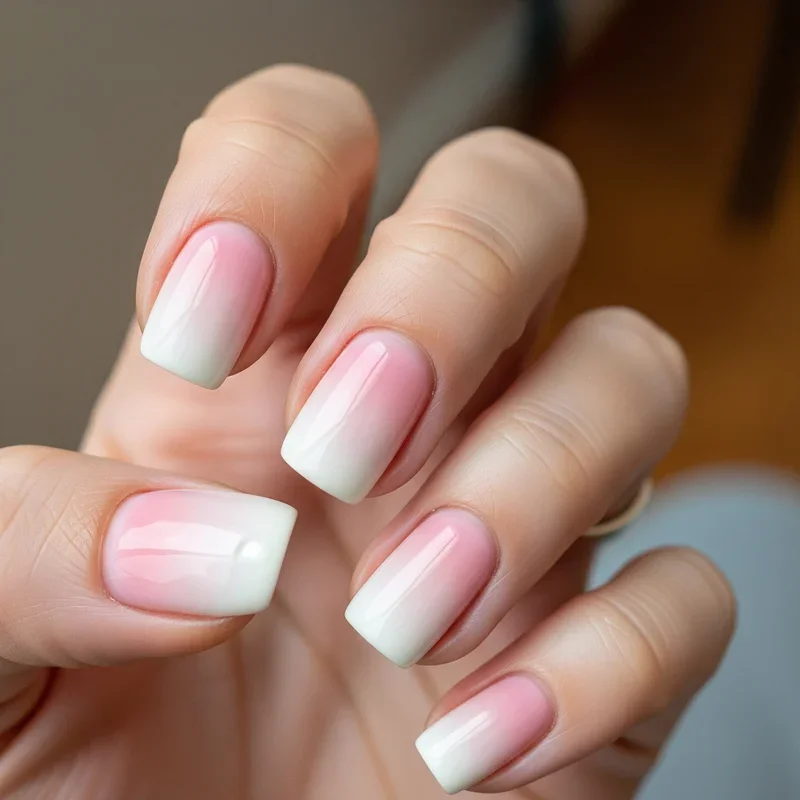
15. Ombre Fade Technique
Master the art of gradient nails with an ombre effect that looks like a professional airbrush job! Using a makeup sponge and two or three complementary colors, you can create a seamless fade that's mesmerizing to look at. Start with the lightest color as your base, then dab increasingly darker shades from tip to cuticle using the sponge. The key is working quickly while the polish is still wet and blending the edges where colors meet. Popular combinations include pink to purple, blue to green, or classic nude to brown. Try a sunset-inspired palette with oranges and pinks for a warm, inviting look. This technique works vertically or horizontally, giving you options for different looks. The gradient effect is forgiving of minor imperfections since the blend is meant to be soft and ethereal. Your nails will look like a beautiful sunset captured in miniature, bringing artistic flair to your everyday style!
Conclusion
These 15 simple nail designs prove that you don't need professional skills or expensive tools to rock amazing nail art every day. From minimalist dots to metallic tips, each design offers a unique way to express your personality while keeping things practical for daily life. The best part? You can mix and match these ideas, creating endless combinations that suit your mood and style. Remember, practice makes perfect, and even imperfect nail art has its charm. So grab your favorite polishes and start experimenting!
Read next: How to Remove Gel X Nails Safely and Effectively
Frequently Asked Questions
Q1: How long do these simple nail designs typically last?
A: With proper base and top coat, expect 5-7 days of wear.
Q2: Can I create these designs on short nails?
A: Absolutely! Most designs work beautifully on nails of any length.
Q3: What tools do I need for basic nail art?
A: Toothpicks, tape, dotting tools, and thin brushes cover most designs.
Q4: How do I prevent smudging while creating designs?
A: Work with thin layers and allow proper drying time between coats.
Q5: Which design is best for complete beginners?
A: Start with single accent nails or simple dots for easy success.
Stay up to date with our latest ideas!