How to Remove Gel X Nails Safely and Effectively
Learn how to remove Gel X nails safely at home without damage. Step-by-step guide with pro tips for healthy, beautiful nails afterward.

So, you've been rocking those gorgeous Gel X nails for weeks, but now it's time to bid them farewell. Whether you're ready for a fresh set or just want to give your natural nails a breather, knowing how to remove Gel X nails safely and effectively is crucial. Trust me, there's nothing worse than damaging your natural nails because you got a bit too eager with the removal process! Gel X nails have taken the beauty world by storm, and for good reason. They're durable, look fantastic, and last way longer than regular polish. But here's the thing: when it comes time to remove them, you can't just peel 'em off like a sticker (tempting as that might be). Nope, these babies require a bit more finesse.
In this guide, we'll walk through everything you need to know about removing your Gel X nails without turning your nail beds into a disaster zone. From gathering the right supplies to aftercare tips that'll keep your nails looking fab, we've got you covered. Let's dive in!
What Are Gel X Nails Anyway?
Before we jump into the removal process, let's quickly chat about what makes Gel X nails special. Unlike traditional gel extensions that require forms or tips glued to your natural nails, Gel X uses soft gel tips that are adhered with gel adhesive and cured under UV or LED light. Pretty neat, right?
These extensions give you that salon-perfect look without the harsh chemicals found in acrylics. Plus, they're lightweight and flexible, making them feel more natural. But this special application method also means you'll need to approach removal differently than you would with regular gel polish or acrylics.
Why Proper Removal Matters
Look, I get it. Sometimes you just want those nails off NOW. Maybe one broke, or perhaps you're just over the color. But rushing the removal process is like trying to untangle Christmas lights by yanking on them – you're gonna have a bad time.
Improper removal can lead to: • Thin, weak natural nails • Painful nail bed damage • Peeling and splitting • Increased risk of infection • Longer recovery time for your natural nails
Taking the time to remove your Gel X nails properly isn't just about avoiding damage; it's about maintaining healthy nails that'll be ready for your next manicure adventure.
How to Remove Gel X Nails Safely and Effectively: Gather Your Supplies
Alright, let's get down to business! First things first, you'll need to round up some supplies. Having everything ready before you start will make the process smoother than a fresh coat of top coat.
Here's what you'll need: • 100% pure acetone (not just nail polish remover) • Cotton balls or pads • Aluminum foil cut into 10 small squares • Nail file (100/180 grit works best) • Cuticle pusher or orange stick • Buffer block • Cuticle oil • Hand cream • Small glass bowl (optional) • Timer • Paper towels
Pro tip: Don't skimp on the acetone quality. The pure stuff works way better than acetone-based polish removers, which contain oils and additives that'll slow down the process.
Step-by-Step Removal Process
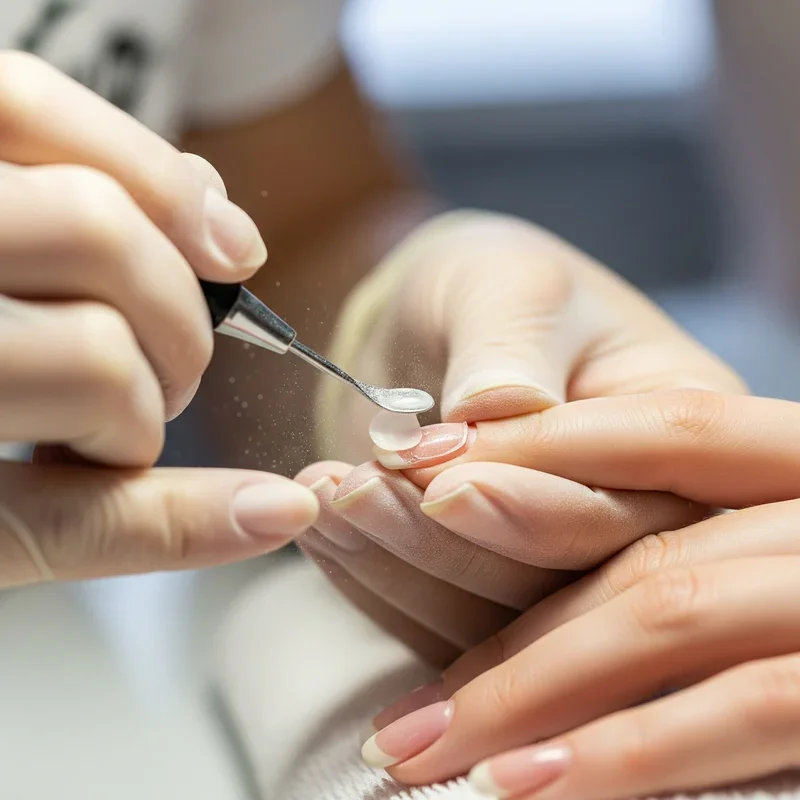
Step 1: File Down the Top Coat
Starting with clean, dry hands, grab your nail file and gently file the surface of each Gel X nail. You're not trying to file the whole thing off (please don't!), just breaking through that shiny top coat. This'll help the acetone penetrate better.
File using long, smooth strokes in one direction. Going back and forth can create heat and discomfort. Take your time with this step – rushing here will only make the rest of the process take longer.
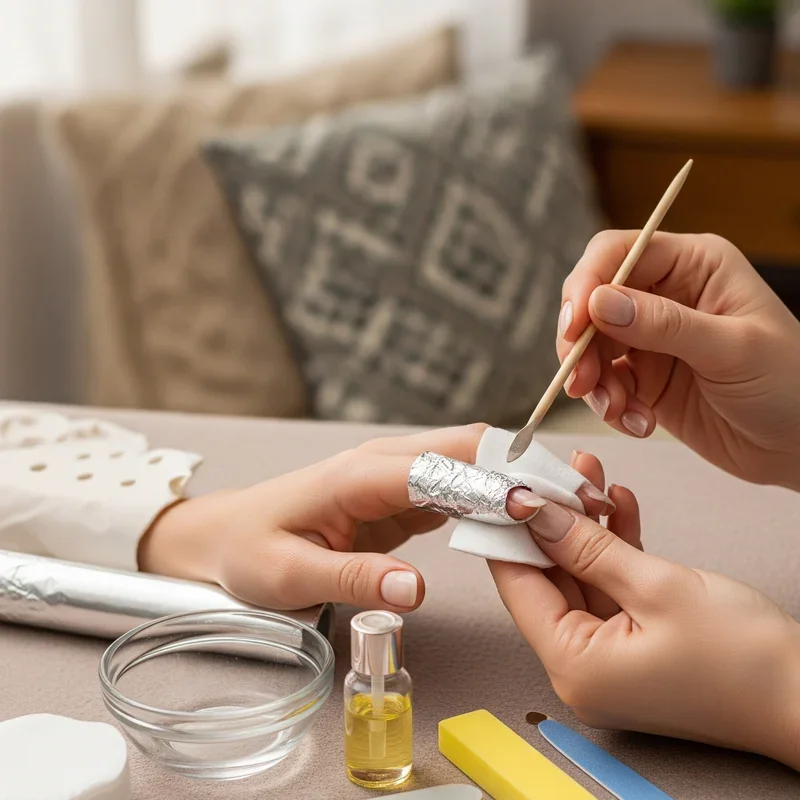
Step 2: Prep Your Cotton and Foil
While you're in prep mode, tear your cotton balls or pads into pieces that'll cover each nail. You want them big enough to cover the entire nail surface but not so huge they're flopping around.
Having your foil squares ready to go means you won't be fumbling around with wet, acetone-soaked fingers later. Trust me on this one!
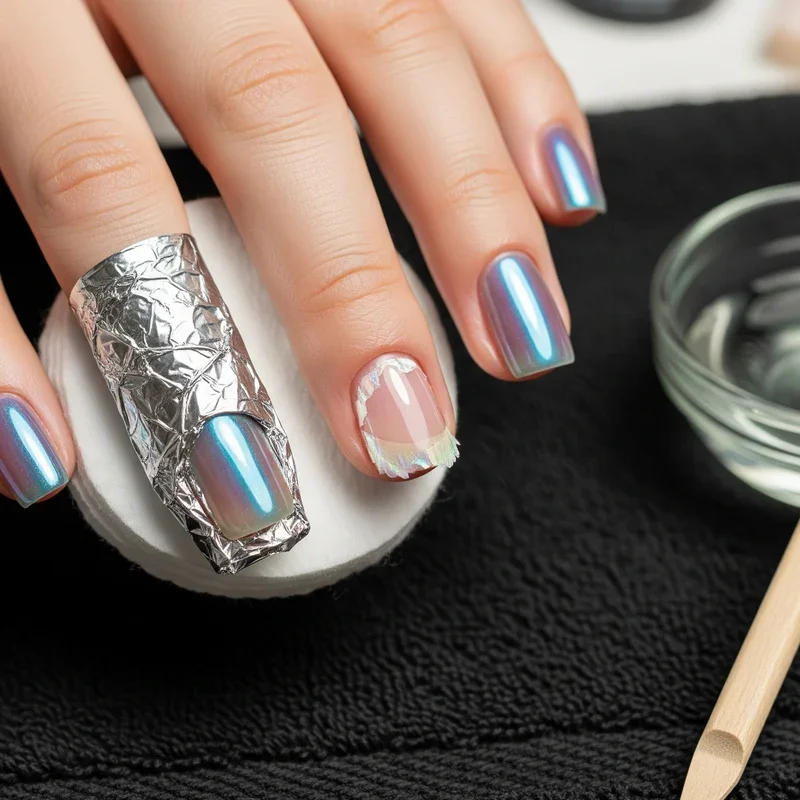
Step 3: Soak Those Nails
Now comes the main event! Saturate each cotton piece with acetone and place it directly on your nail. Wrap each finger with a foil square, making sure the cotton stays in place. The foil creates a little acetone sauna for your nails – fancy, huh?
Some folks prefer the bowl method, where you soak your fingertips directly in acetone. While this works, the foil method is less messy and uses less acetone. Plus, you can still use your hands (sort of) while you wait!
Step 4: Patience Is a Virtue
Set your timer for 15-20 minutes and resist the urge to peek! I know, I know – sitting there looking like you've got aluminum finger puppets isn't exactly glamorous, but good things come to those who wait.
Use this time to catch up on your favorite show, listen to a podcast, or practice your one-handed phone scrolling skills. Whatever keeps you from getting antsy and checking too soon!
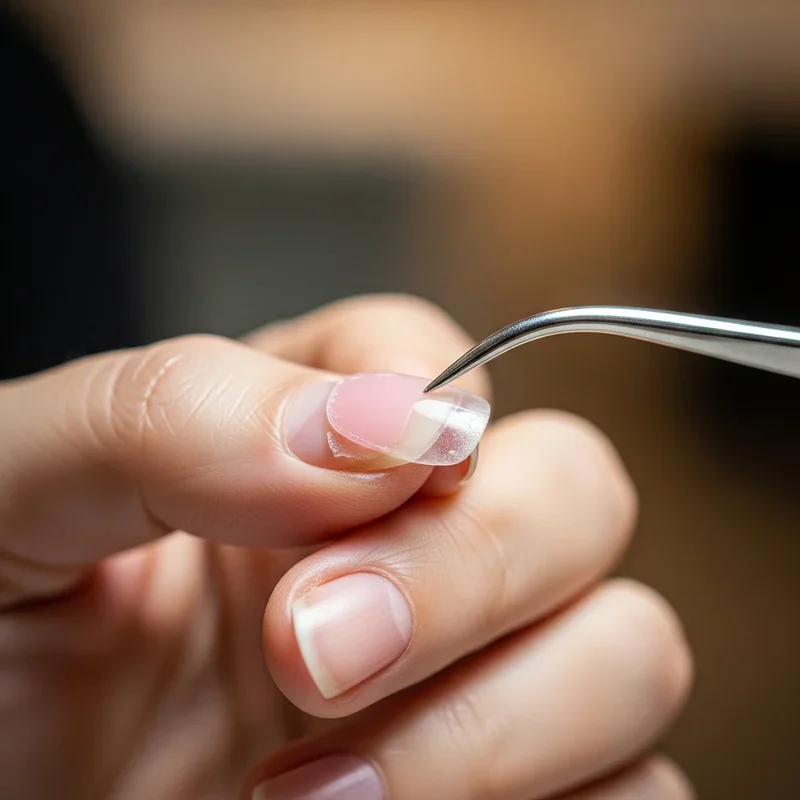
Step 5: Check and Gently Push
After your timer goes off, remove one foil wrap and check the progress. The Gel X should look kinda mushy and be lifting away from your natural nail. If it's ready, use your cuticle pusher to gently slide the softened gel off.
If it's still hanging on tight, rewrap that finger and give it another 5-10 minutes. Every set of nails is different, so don't worry if yours need extra time.
Step 6: Remove Remaining Residue
Once you've got the bulk of the Gel X off, you might notice some stubborn bits still clinging on. Don't go crazy with the scraping! Instead, use your buffer to gently smooth away any remaining gel.
If there's still some residue, you can do another quick acetone soak with fresh cotton. It's better to be patient than to damage your nail plate by being too aggressive.

Post-Removal Care: Show Your Nails Some Love
Congrats! You've successfully learned how to remove Gel X nails safely and effectively. But we're not done yet – your nails need some serious TLC after all that acetone exposure.
Immediate Aftercare
First up, wash your hands thoroughly with soap and warm water to remove any acetone residue. Pat them dry with a soft towel (no rubbing – your nails are sensitive right now).
Next, it's time to rehydrate! Apply cuticle oil generously to each nail and massage it in. Don't forget to get under your nails and around the entire cuticle area. Your nails are probably feeling pretty parched after their acetone bath.
The First 24 Hours
Your nails might feel a bit tender or look slightly discolored immediately after removal. That's totally normal! Here's what to do:
• Apply cuticle oil 3-4 times throughout the day • Use a rich hand cream after each hand washing • Avoid harsh chemicals or cleaning products • Skip the nail polish for at least 24 hours • Be gentle with your hands
Long-Term Nail Recovery
If your nails are looking a bit worse for wear, don't panic. With proper care, they'll bounce back! Here's your recovery game plan:
Keep them short: Trim your nails regularly to prevent breaking and splitting
Moisturize religiously: Oil and cream should become your best friends
Use a strengthening treatment: Look for products with keratin or biotin
Protect your hands: Wear gloves when cleaning or doing dishes
Eat nail-friendly foods: Load up on protein, biotin, and vitamins
Common Mistakes to Avoid
Even with the best intentions, it's easy to make mistakes during the removal process. Here are the big no-nos to steer clear of:
Peeling or Picking
I know it's tempting when you see that edge lifting, but peeling off Gel X nails is like ripping off a band-aid that's glued to your hair. You'll take layers of your natural nail with it, leaving them thin and damaged.
Using Tools Incorrectly
Your cuticle pusher isn't a chisel! Using metal tools too aggressively can cause permanent damage to your nail bed. Always push gently and at an angle, never straight down.
Skipping the Prep Work
Not filing the top coat first is like trying to clean a window with the screen still on. The acetone can't do its job properly, making the whole process take way longer.
Rushing the Process
Trying to speed things up by using heat or forcing the gel off will only lead to tears (literally and figuratively). Give the acetone time to work its magic!
When to Seek Professional Help
Sometimes, despite our best efforts, DIY removal just isn't working out. Here's when it's time to throw in the towel and head to the salon:
• If you've soaked for 30+ minutes with no progress • When you notice bleeding or severe pain • If your nails are already damaged or infected • When you're dealing with multiple broken extensions • If you're just not comfortable doing it yourself
There's no shame in getting professional help! Nail techs have specialized tools and experience that can make removal quicker and safer.
Alternative Removal Methods
While the acetone soak method is the gold standard for learning how to remove Gel X nails safely and effectively, there are a few alternatives worth mentioning:
The E-File Method
Some salons use electric files to remove Gel X nails. This method is faster but requires skill and the right equipment. Unless you're experienced with e-files, this isn't recommended for DIY removal.
Non-Acetone Removers
Some brands make gel polish removers without acetone. While gentler on your skin, they typically take much longer to work and may not be effective on Gel X adhesive.
The Warm Water Method
Some people swear by soaking in warm, soapy water to loosen gel nails. While this might help with lifting edges, it won't dissolve the gel adhesive like acetone does.
Maintaining Healthy Nails Between Applications
Taking breaks between Gel X applications gives your natural nails time to recover and grow strong. Here's how to make the most of your nail vacation:
• Use a nail strengthener: Apply a quality strengthening polish to protect your nails • Keep them polished: Even regular polish provides some protection • Trim regularly: Short nails are less likely to break or snag • Buff gently: Light buffing improves circulation and appearance • Stay hydrated: Drink plenty of water for healthy nail growth
Troubleshooting Common Issues
Even when you follow all the steps, sometimes things don't go according to plan. Here's how to handle common hiccups:
Gel Won't Budge
If your Gel X nails are being stubborn, try: • Filing more of the top surface • Using fresh acetone (old acetone loses potency) • Increasing soak time • Gently wiggling the foil to redistribute acetone
Skin Irritation
Acetone can be harsh on sensitive skin. If you're experiencing irritation: • Apply petroleum jelly around your nails before soaking • Use less acetone on the cotton • Rinse immediately if burning occurs • Moisturize thoroughly after removal
Weak or Thin Nails
If your nails feel paper-thin after removal: • Avoid all nail products for a week • Use a nail hardener designed for damaged nails • Take biotin supplements • Consider getting professional treatments
The Environmental Impact
Let's talk about something that doesn't get enough attention – the environmental impact of nail care. When removing Gel X nails:
• Dispose of acetone-soaked materials properly • Don't pour acetone down the drain • Consider reusable alternatives to cotton balls • Look for eco-friendly acetone options • Recycle foil when possible
Being beautiful doesn't mean we can't be responsible, right?
Conclusion
There you have it, folks! You now know exactly how to remove Gel X nails safely and effectively without turning your fingertips into a disaster zone. Remember, patience is key, and taking care of your natural nails between applications will keep them healthy and strong. Whether you're switching up your style or giving your nails a breather, following these steps will ensure you're ready for whatever nail adventure comes next!
Read next: 15 November Nail Ideas That Feel Warm and Stylish
Frequently Asked Questions
Q1: How long should I wait between Gel X applications?
A: Give your nails 1-2 weeks to breathe between applications.
Q2: Can I reuse the Gel X tips after removal?
A: No, Gel X tips are single-use only and can't be reused.
Q3: Is it normal for nails to hurt during removal?
A: Mild sensitivity is normal, but significant pain means stop immediately.
Q4: What's the fastest way to remove Gel X nails?
A: E-filing at a salon is fastest, but acetone soaking is safest.
Q5: Can I use regular nail polish remover instead?
A: No, you need 100% acetone for effective Gel X removal.
Stay up to date with our latest ideas!