How to Thin Old Nail Polish Without Ruining It
Learn how to thin old nail polish without ruining it using simple household tricks that restore thick, clumpy bottles to smooth perfection.

We've all been there. You reach for your favorite shade of nail polish, twist off the cap, and find something that looks more like sludge than a smooth lacquer. It's frustrating, right? You paid good money for that bottle, and now it seems like it's headed straight for the trash. But hold on a second, because tossing it out would be a real waste. The truth is, thickened nail polish doesn't mean ruined nail polish. With a few clever tricks and the right approach, you can bring that gloopy bottle back to life without compromising the color or formula. Knowing how to thin old nail polish without ruining it is one of those beauty skills that saves you money and keeps your collection in top shape for years to come.
Why Does Nail Polish Get Thick and Clumpy
Before jumping into the fixes, it helps to understand what's actually going on inside that little glass bottle. Nail polish is essentially a mixture of solvents, resins, plasticizers, and pigments. The solvents are what keep the formula in its liquid, paintable state. Over time, though, those solvents evaporate, especially if the bottle isn't sealed properly or gets exposed to air frequently.
Every single time you open that cap, a small amount of solvent escapes into the air. After dozens of uses, there's noticeably less solvent left in the bottle, and the remaining ingredients start to thicken up. It's kind of like leaving a can of paint open overnight. The stuff that keeps it fluid simply disappears.
Temperature plays a role too. Storing your polish in a bathroom where temperatures fluctuate between hot showers and cooler periods accelerates the evaporation process. Direct sunlight is another culprit that breaks down the chemical structure of the formula, making it goopy and hard to work with. So if you've been keeping your bottles on a sunny windowsill, that might explain why they've turned into a sticky mess.
How to Thin Old Nail Polish Without Ruining It Using Nail Polish Thinner
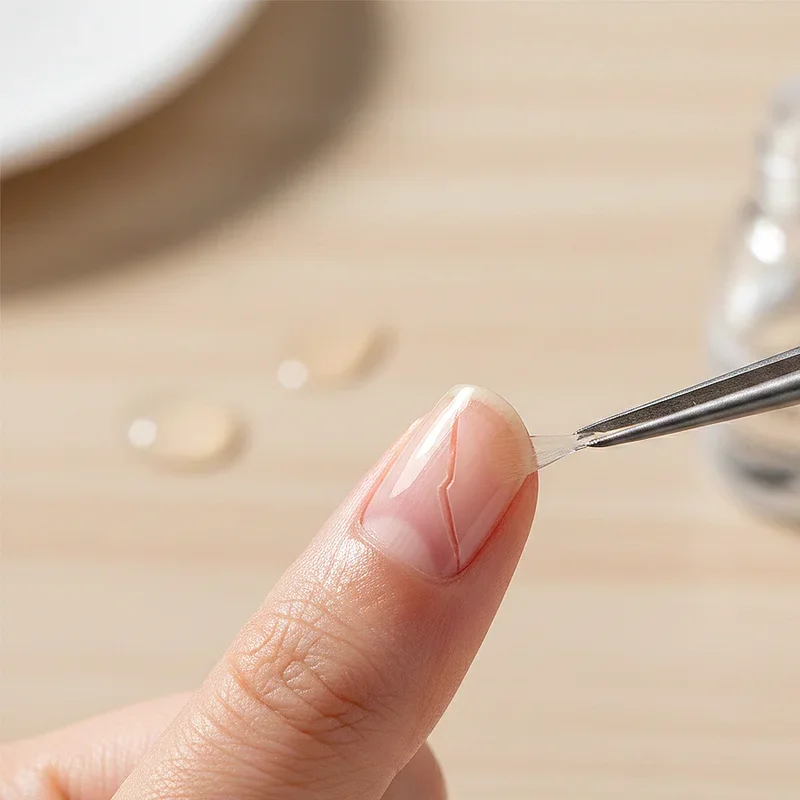
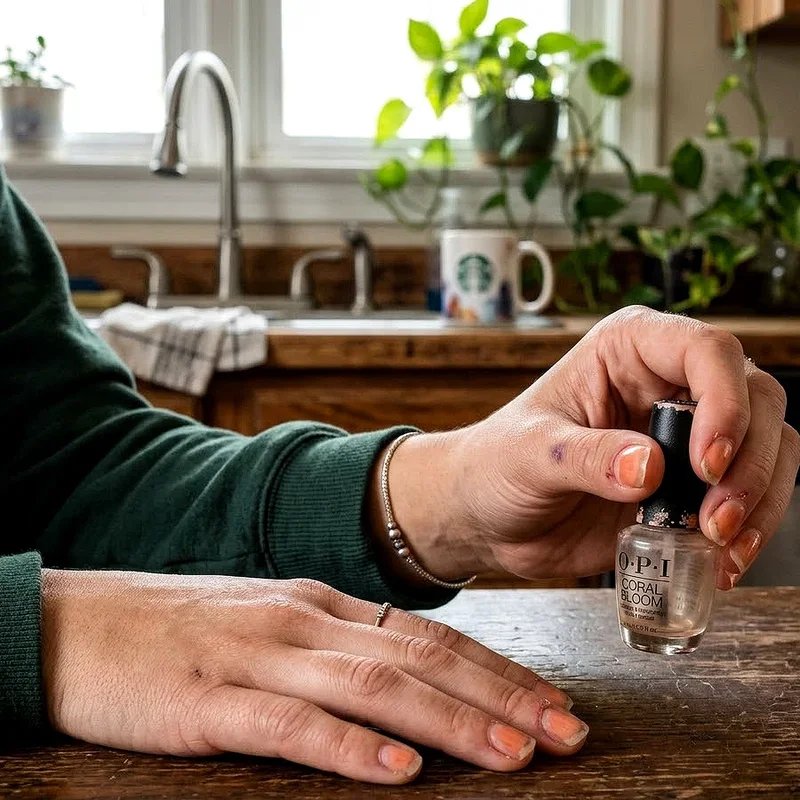
Let's cut right to the chase. The single best method for thinning out old nail polish is using a dedicated nail polish thinner. These products are specifically formulated to replace the solvents that have evaporated from your polish without messing up the color, finish, or wearability of the product.
Here's how to do it properly. Start by adding just two or three drops of thinner into the bottle. That's it. Resist the urge to pour in half the bottle, because less really is more in this situation. Once you've added those drops, roll the bottle gently between your palms for about thirty seconds to a minute. Rolling mixes the thinner evenly throughout the formula without creating air bubbles that could affect application later.
After rolling, check the consistency. If it's still too thick, add another drop or two and repeat the process. It's way better to go slowly than to overdo it and end up with a watery, sheer mess that won't give you decent coverage on the nail. Patience pays off here, and you'll be rewarded with polish that performs almost like new.
Popular brands like OPI, Seche Vite, and Beauty Secrets all make excellent nail polish thinners that are easy to find at beauty supply stores or online. They typically cost just a few dollars and can restore dozens of bottles over their lifetime, making them an incredibly worthwhile investment for any polish enthusiast.
The Hot Water Trick That Actually Works
If you don't have nail polish thinner on hand and you need a quick fix, the hot water method is your best friend. This approach doesn't technically thin the polish in a chemical sense, but it temporarily warms the formula enough to make it flow smoothly again. Think of it like warming up honey that's crystallized in the jar.
Fill a bowl or mug with hot water. Not boiling, mind you, just hot enough that you wouldn't want to stick your hand in it for too long. Then place the sealed nail polish bottle into the water and let it sit for about two to three minutes. The heat will warm up the solvents inside and reduce the viscosity of the formula.
After a couple of minutes, pull the bottle out, dry it off, and give it a good roll between your hands. You should notice the polish flows much more easily off the brush. Keep in mind that this is a temporary solution. Once the polish cools back down, it'll start to thicken up again. But for a quick manicure when you're in a pinch, it does the job beautifully.
What You Should Never Use to Thin Nail Polish
Now, here's where a lot of people go wrong, and honestly, it's an easy mistake to make. When faced with a thick bottle of polish, some folks reach for nail polish remover or pure acetone as a thinner. On the surface, it seems logical since both products dissolve nail polish, so they should thin it out, right? Well, not exactly.
Nail polish remover is designed to break down and dissolve the formula entirely. When you add it to a bottle of polish, it doesn't just thin the consistency. It actually degrades the ingredients, compromises the color, and weakens the formula's ability to adhere to your nails. You might end up with something that looks thinner but chips within hours of application and never dries properly.
Acetone is even worse in some ways. It's incredibly harsh and evaporates much faster than the original solvents in your polish. So even if it temporarily loosens things up, you'll find the polish gets even thicker than before once the acetone disappears. It's a vicious cycle that'll ruin your polish faster than just leaving it alone.
Other substances to avoid include water, rubbing alcohol, and hydrogen peroxide. None of these are compatible with nail polish formulas, and they'll all cause separation, bubbling, or complete breakdown of the product. Stick with proper nail polish thinner and you won't have these headaches.
Rolling Versus Shaking Your Nail Polish Bottle
This might seem like a small detail, but it makes a real difference in how your polish performs. You've probably seen people shake their nail polish bottles vigorously before painting their nails. It seems harmless enough, but shaking actually introduces tiny air bubbles into the formula that cause problems during application.
Those air bubbles lead to a bumpy, uneven finish on your nails. They can also cause the polish to dry with little pits and imperfections that make your manicure look sloppy. When you're trying to restore a thickened polish, the last thing you want is to add another issue on top of the thickness problem.
Rolling the bottle between your palms is the way to go. This motion mixes the formula thoroughly while keeping the consistency smooth and bubble free. It takes a bit longer than shaking, sure, but the results speak for themselves. Your polish will apply more evenly, dry more smoothly, and look far more professional on the nail.
How to Thin Old Nail Polish Without Ruining It for Gel and Specialty Formulas
It's worth noting that gel polishes, magnetic polishes, and other specialty formulas have different chemical compositions than regular lacquer. Standard nail polish thinner may not work on these products, and in some cases, it could actually damage the formula beyond repair.
For gel polish that's gotten thick, your best bet is to contact the manufacturer or check their website for specific recommendations. Some gel brands sell their own thinning solutions that are compatible with their particular chemistry. Using a generic thinner on a specialty product is a bit like putting diesel fuel in a gasoline engine. It just doesn't work the way you'd hope.
If you can't find a brand specific thinner for your gel polish, the hot water method mentioned earlier is usually a safe alternative. It doesn't add any foreign chemicals to the formula, so there's minimal risk of a negative reaction. Just warm, roll, and paint as usual.
Proper Storage Tips to Prevent Polish From Thickening
An ounce of prevention is worth a pound of cure, as the old saying goes, and that definitely applies to nail polish care. Taking a few simple steps to store your polish correctly can dramatically extend its shelf life and keep you from having to deal with thick, clumpy formulas in the first place.
Store your bottles upright in a cool, dark place. A bedroom drawer or a dedicated storage box works perfectly. Avoid bathrooms where humidity and temperature swings are common, and definitely keep your collection away from direct sunlight or heat sources like radiators and windowsills.
Before you put the cap back on after each use, take a moment to wipe the neck of the bottle with a lint free cloth or a cotton pad soaked in a tiny bit of nail polish remover. This removes any dried polish residue from the threading area, which helps the cap seal tightly and prevents air from sneaking in between uses. It's a small habit that makes a surprisingly big difference over time.
Also, make sure you're closing the cap firmly every single time. A loose cap is one of the fastest ways to lose solvents to evaporation. Give it a good twist until you feel it click or tighten securely, and your polish will thank you for it months down the road.
Signs That Your Nail Polish Is Beyond Saving
As much as we'd all love to rescue every bottle in our collection, sometimes a polish is simply past its prime. Knowing when to call it quits saves you time and frustration, and prevents you from applying a subpar product to your nails.
If the polish has completely separated and won't mix back together after extended rolling and a round of thinner, it's probably done for. The same goes for polish that has changed color significantly, developed a strange smell, or has become so rubbery that it stretches rather than flows. These are all signs that the chemical structure has broken down beyond the point of repair.
Another telltale sign is if the polish has gotten stringy or forms clumps that won't dissolve no matter how much thinner you add. At that point, you're better off letting go and replacing the shade. Most regular nail polishes have a shelf life of about two years once opened, so if your bottle has been kicking around for much longer than that, it might be time to say goodbye.
Quick Checklist for Thinning Old Nail Polish
Use a dedicated nail polish thinner, never acetone or remover
Add just two to three drops at a time
Roll the bottle gently between your palms instead of shaking
Test consistency before adding more thinner
Try the hot water method for a quick temporary fix
Store bottles upright in a cool, dark location
Wipe bottle necks clean before recapping
Check specialty polish guidelines before using generic thinner
Conclusion
Learning how to thin old nail polish without ruining it is a simple skill that keeps your favorite shades alive and your wallet happy. With the right thinner, a gentle rolling technique, and smart storage habits, you can extend the life of nearly any bottle in your collection. Just remember to go slow with the thinner, avoid harsh chemicals like acetone, and know when a bottle has reached the end of its road. Your nails deserve the best, and a little care goes a long way toward keeping your polish game strong.
Read next: How to Soften Nail Glue Safely at Home
Frequently Asked Questions
Q1. Can I use acetone to thin my old nail polish?
A: No, acetone degrades the formula, weakens adhesion, and causes faster thickening afterward.
Q2. How many drops of thinner should I add at once?
A: Start with two to three drops, then add more gradually if needed.
Q3. Does the hot water method permanently fix thick nail polish?
A: No, it temporarily warms the formula but thickness returns once it cools down.
Q4. How long does opened nail polish typically last before thickening?
A: Most opened nail polishes maintain good consistency for roughly two years with proper storage.
Q5. Can I use regular nail polish thinner on gel polish formulas?
A: Generally no, gel polishes need brand specific thinners due to their different chemical composition.
Stay up to date with our latest ideas!